> ## Documentation Index
> Fetch the complete documentation index at: https://zovi.mintlify.site/llms.txt
> Use this file to discover all available pages before exploring further.
# The appointments calendar
> See and manage all your bookings on a day, week, or month calendar. Create new bookings, and confirm, complete, reschedule, or cancel appointments.
The **Appointments** calendar is where you manage bookings. Open it from
**Appointments** in the sidebar (under **Operations**). It shows your schedule in
**day**, **week**, or **month** views, in your **clinic's timezone**, and refreshes
on its own so you're always looking at the latest.
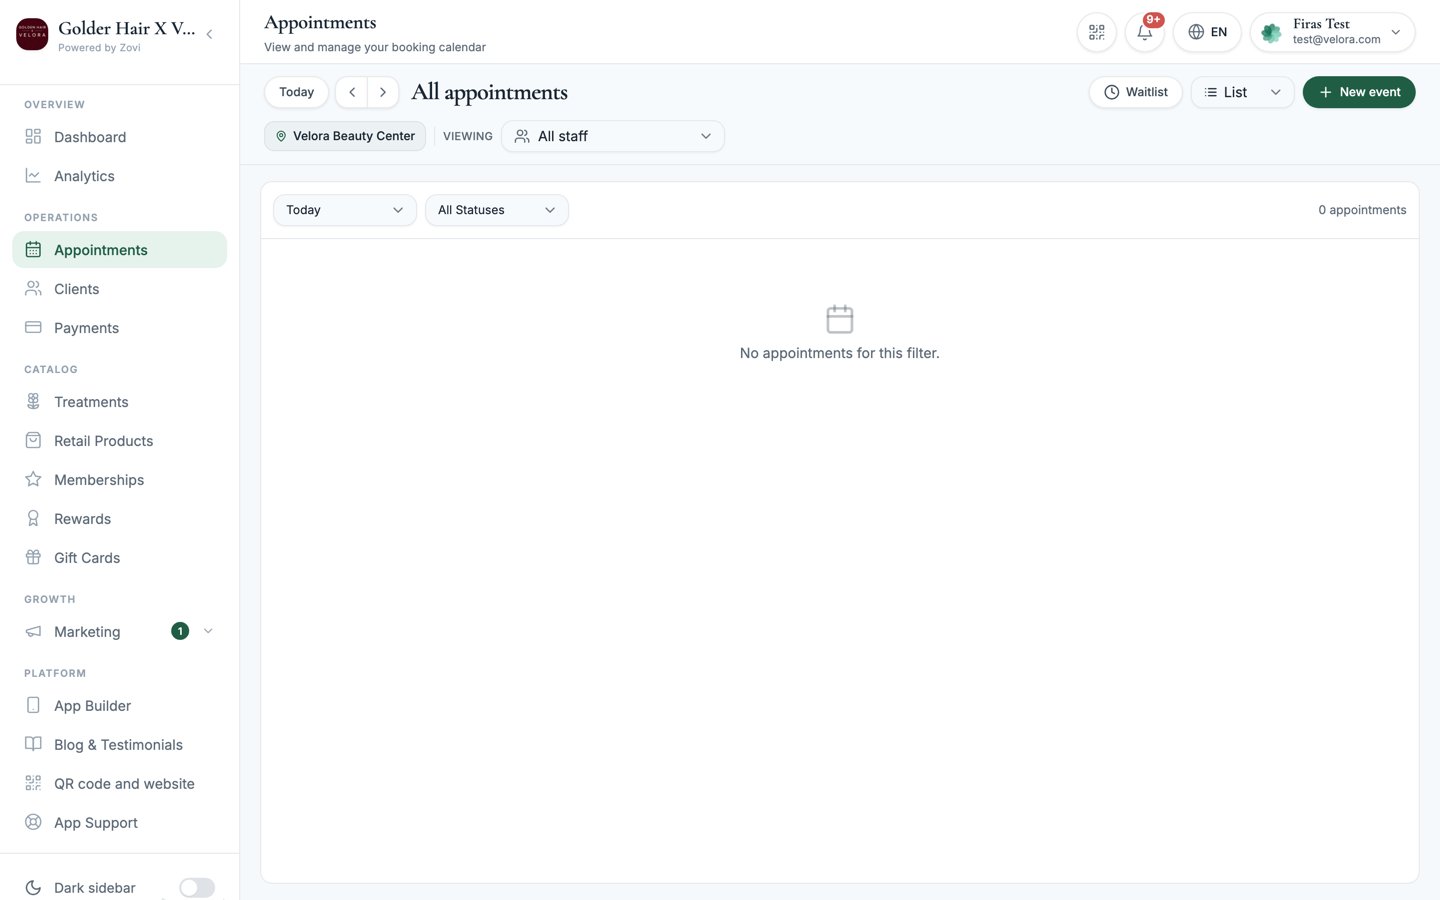 ## The toolbar
Above the calendar you'll find:
* **Day / Week / Month**: switch how much of your schedule you see at once.
* **Location selector**: choose which branch's calendar to view (if you have more
than one).
* **Staff filter pills**: tap a staff member's pill to show only their
appointments; tap again to include them back.
* **New booking**: create an appointment (see below).
## Create a new booking
Select **New booking** to open the **New Booking** modal.
Pick **Existing client** to book someone already on your books, or
**Guest / Walk-in** for someone who isn't.
* For an **existing client**, search for them by name.
* For a **guest**, enter a **Guest name** and **phone number**.
Select the **Treatment** being booked.
Pick the **Staff** member, or leave it as **Any available** to let the clinic
assign whoever's free.
Set the **Date** and **Time** for the appointment.
Confirm to add the appointment to the calendar.
You can also start a booking from a client. Use **Book** on their
[profile](/clients/client-profile) or **Book appointment** from the
[Clients list](/clients/overview). The client is filled in for you.
## Booking statuses
Every appointment has a status that tells you where it stands:
| Status | Meaning |
| ------------- | ----------------------------------------------- |
| **Pending** | Requested but not yet confirmed |
| **Confirmed** | Locked in and expected |
| **Completed** | The client attended and the appointment is done |
| **Cancelled** | Called off |
| **No-show** | The client didn't turn up |
## Manage a booking
Select any appointment on the calendar to open its detail. The actions you see
depend on the appointment's current status.
* **Confirm appointment**: for a **Pending** booking, confirm it.
* **Mark completed**: for a **Confirmed** booking, mark it done once the client
has been seen.
* **No-show**: mark that the client didn't attend.
* **Cancel**: call off the appointment. You can add a **note** explaining why.
* **Reschedule**: move the appointment to a new date or time.
Marking a booking **completed** feeds the client's **visit history**. It counts
towards their visit total on their profile and in the [Clients
list](/clients/overview). It's worth marking bookings completed promptly so
those records stay accurate.
If your clinic books through an external platform, the client app explains the
hand-off to your booking partner before it sends the client off-site, and shows
a confirmation sheet with the steps they'll follow. See
[Booking settings](/settings/booking).
## Related
Scan a client's QR when they arrive to award check-in points.
See a client's full appointment history.
Choose between native booking and an external booking platform.
## The toolbar
Above the calendar you'll find:
* **Day / Week / Month**: switch how much of your schedule you see at once.
* **Location selector**: choose which branch's calendar to view (if you have more
than one).
* **Staff filter pills**: tap a staff member's pill to show only their
appointments; tap again to include them back.
* **New booking**: create an appointment (see below).
## Create a new booking
Select **New booking** to open the **New Booking** modal.
Pick **Existing client** to book someone already on your books, or
**Guest / Walk-in** for someone who isn't.
* For an **existing client**, search for them by name.
* For a **guest**, enter a **Guest name** and **phone number**.
Select the **Treatment** being booked.
Pick the **Staff** member, or leave it as **Any available** to let the clinic
assign whoever's free.
Set the **Date** and **Time** for the appointment.
Confirm to add the appointment to the calendar.
You can also start a booking from a client. Use **Book** on their
[profile](/clients/client-profile) or **Book appointment** from the
[Clients list](/clients/overview). The client is filled in for you.
## Booking statuses
Every appointment has a status that tells you where it stands:
| Status | Meaning |
| ------------- | ----------------------------------------------- |
| **Pending** | Requested but not yet confirmed |
| **Confirmed** | Locked in and expected |
| **Completed** | The client attended and the appointment is done |
| **Cancelled** | Called off |
| **No-show** | The client didn't turn up |
## Manage a booking
Select any appointment on the calendar to open its detail. The actions you see
depend on the appointment's current status.
* **Confirm appointment**: for a **Pending** booking, confirm it.
* **Mark completed**: for a **Confirmed** booking, mark it done once the client
has been seen.
* **No-show**: mark that the client didn't attend.
* **Cancel**: call off the appointment. You can add a **note** explaining why.
* **Reschedule**: move the appointment to a new date or time.
Marking a booking **completed** feeds the client's **visit history**. It counts
towards their visit total on their profile and in the [Clients
list](/clients/overview). It's worth marking bookings completed promptly so
those records stay accurate.
If your clinic books through an external platform, the client app explains the
hand-off to your booking partner before it sends the client off-site, and shows
a confirmation sheet with the steps they'll follow. See
[Booking settings](/settings/booking).
## Related
Scan a client's QR when they arrive to award check-in points.
See a client's full appointment history.
Choose between native booking and an external booking platform.