

A custom plan’s bundle price bypasses your normal discounts. The price you
set is the price the client pays. Membership discounts and other automatic
reductions don’t apply on top of it. This keeps tailored pricing predictable.
Create a custom plan
You can start a custom plan two ways:- From a client profile: open the ⋮ More menu and choose Custom Plan. The Client is pre-selected for you.
- From the Custom Plans page: start a new plan and pick the client yourself.
1
Open the custom plan builder
From the client’s profile choose More → Custom Plan, or open the Custom
Plans page and start a new plan.
2
Choose the client
Set Client. If you started from a client’s profile this is already filled
in and locked to that client.
3
Name and describe the plan
Give the plan a Plan Name the client will recognise, and add a
Description explaining what’s included and why.
4
Add treatments and products
Add the Treatments for the plan, and any Retail Products. Set the
quantity for each line, for example a course of three sessions.
5
Set the bundle price
Enter the Bundle Price the client will pay. As a reference, the builder
shows the Retail total, the normal price of everything you’ve added, so
you can see the value you’re offering.
6
Choose whether to award points
Turn on Award loyalty points if you want the client to earn points when
they buy this plan.
7
Create and notify
Select Create & Notify. The plan is created and the client is notified to
purchase it in your app. You’ll see a confirmation that the plan was created
and the client notified.
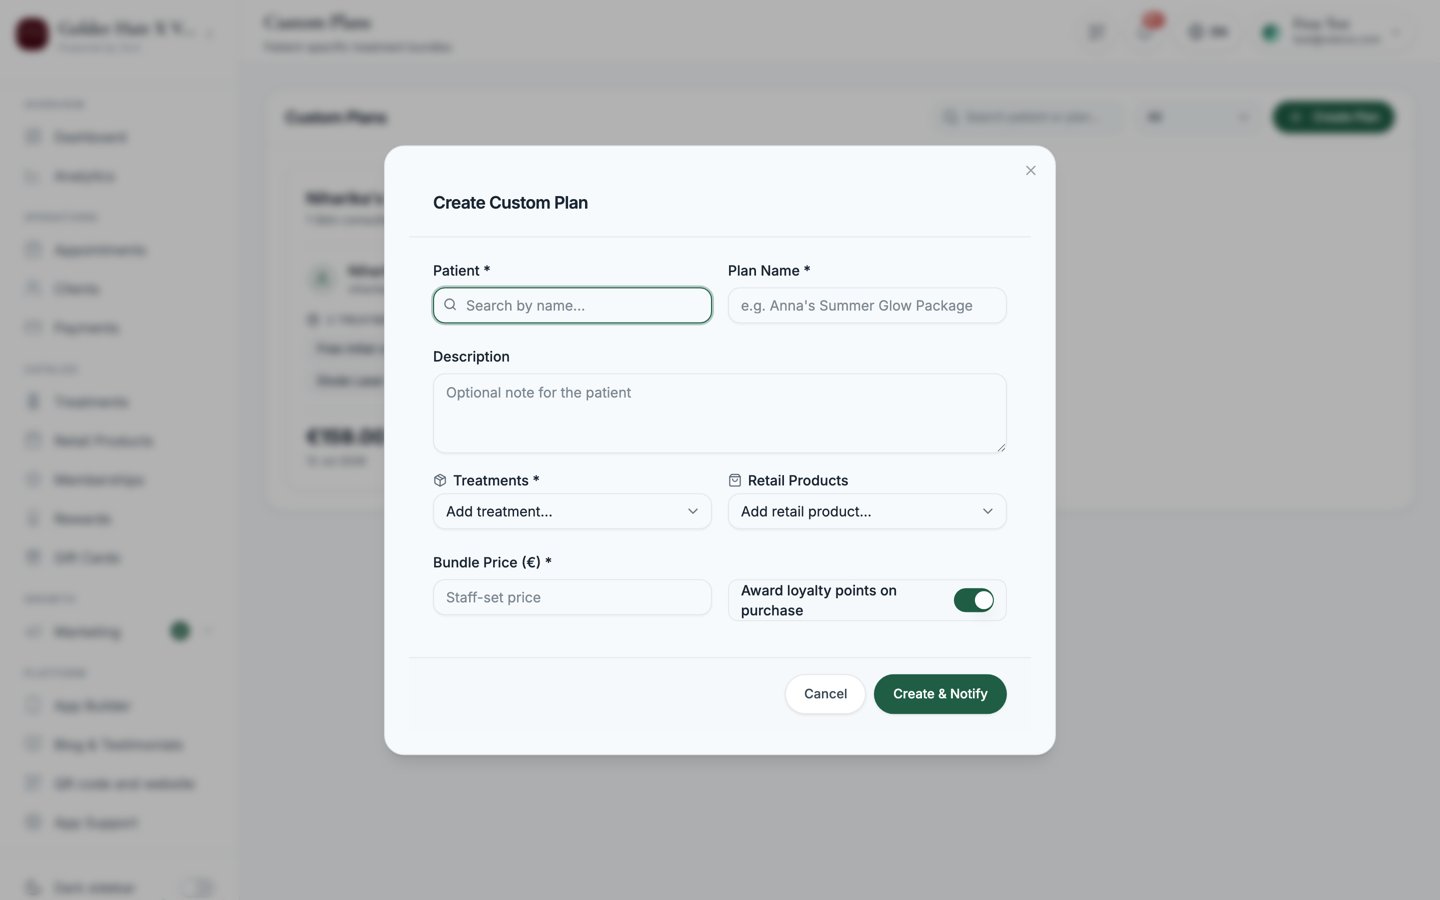
Screenshot: the custom plan builder showing Client, Plan Name, Description, the Treatments and Retail Products lines with quantities, and the Bundle Price with the Retail total reference.
Manage your custom plans
The Custom Plans page lists every plan you’ve created. Use it to track what’s been bought and to tidy up plans you no longer need.- Search for a plan by name.
- Filter by status: choose
Available,Purchased, orRemoved.
Statuses
Actions
Each plan has actions depending on its status:- View details: open the plan to see what’s included.
- Edit: change the plan. Available for Available plans only (once a plan is purchased, it’s locked).
- Duplicate: copy the plan as the basis for a new one.
- Resend: re-offer a plan. Available for Removed plans only.
- Delete: remove the plan.
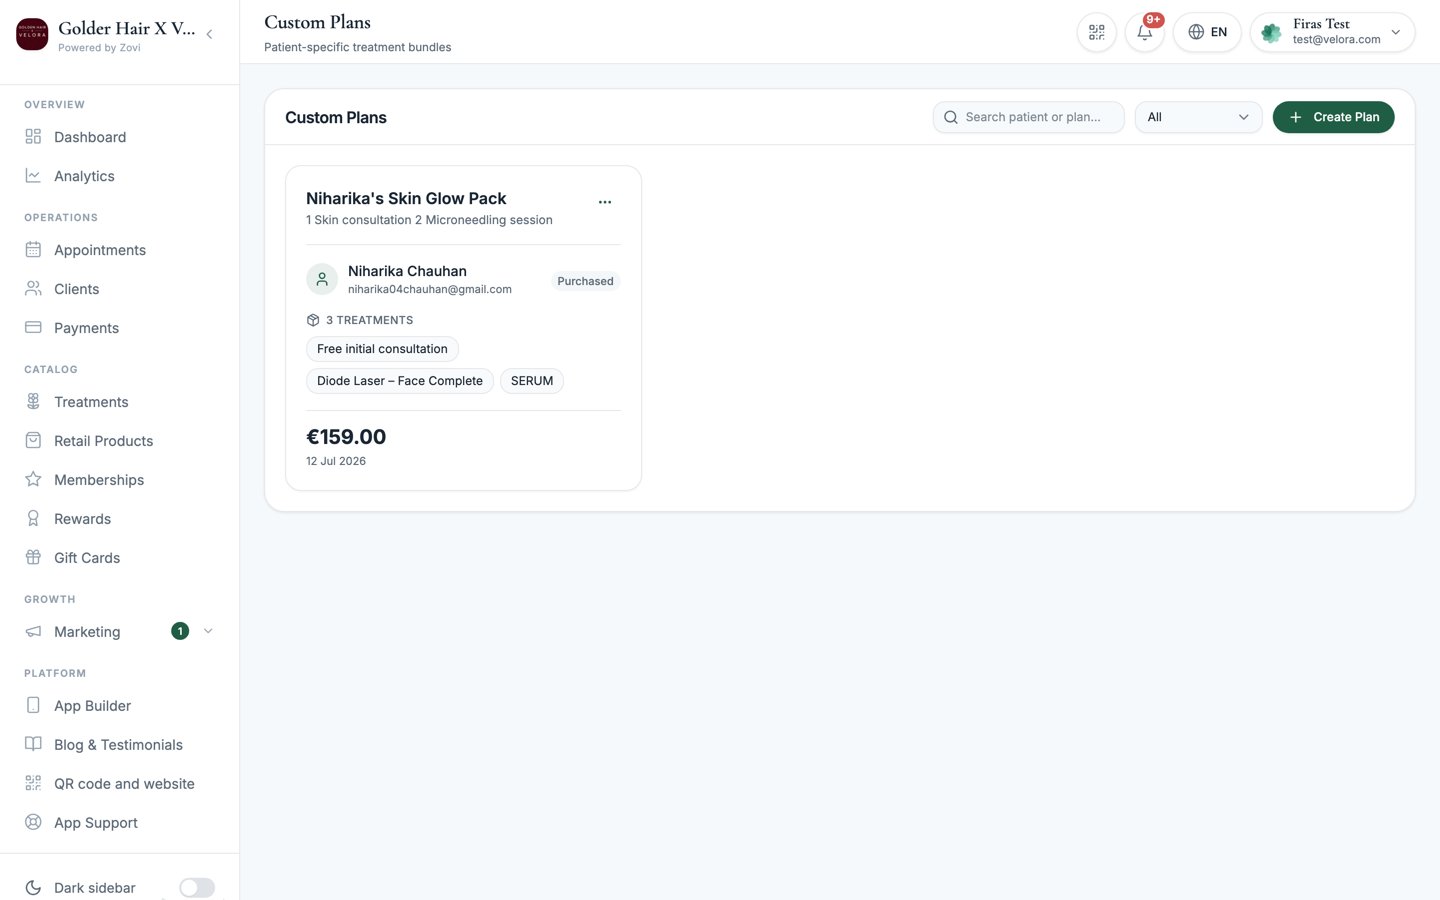
Screenshot: the Custom Plans list with the search box, the Available/Purchased/Removed status filter, and per-row actions.
After the client buys the plan
Once a client buys a custom plan, the order becomes your delivery checklist.- Everything in the plan appears as its own fulfilment row on the order. Mark each row fulfilled as you deliver it, and undo a row if you tick it by mistake.
- If the plan promises something that isn’t a catalog item, add a manual row to the order and track it the same way.
- The client sees the same order with a read-only view of what has been delivered so far.
One QR for the whole plan
The order carries one QR code that stays valid for the life of the plan. The client shows it at every visit. Scanning it checks them in and opens the order, so you can tick off what they’ve had while they’re standing there. See Check a client in. Check-in points are awarded once per day, so scanning the same QR twice doesn’t double-award.Custom plans don’t mint a separate redeem QR for each session the way a
standard reward does. The one order QR is the whole thing, and sessions are
ticked off by your team on the order.
Related
Back to the client profile
Start a custom plan from a client’s More menu.
Send an offer instead
For a discount rather than a bundle, send an offer.